


Building from scratch is a vast undertaking and can be very daunting. It’s therefore a good idea to design your house in modules. That way, you can build a room, move into it, build more, move into them. Not only will you gradually be improving your living space, you will also be learning your land, environment and what exactly you want, as you go.
You can do the same with all your systems. Start out with a small water catchment, power and garden system that meets your basic needs, and gradually step it up.
Building in this way gives you an intimacy with your home that can’t be beat. It’s like watching your child grow.

If you have bought land with nothing on it, it’s a great idea to build yourself a small starter cabin that has nothing to do with your final home design. You can always strip it down and use the materials later, or keep it as a shed.
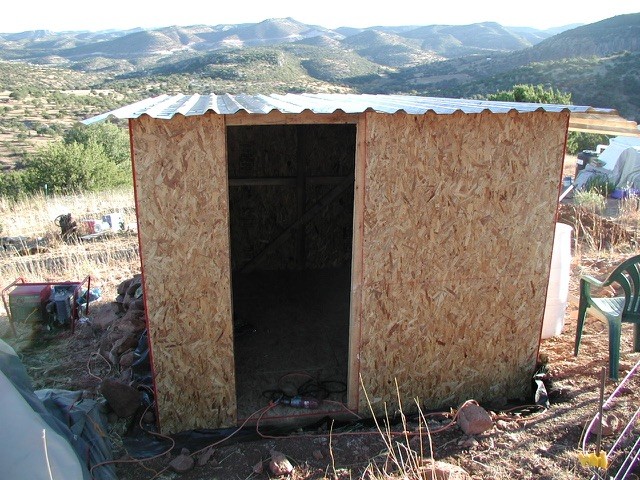
We have built two homes from scratch. The first time, we lived in a bus while we built the house. This worked great, but was very hot in summer and cold in winter. Still, it was a great start. The second time, we thought we could build one room of the house quickly and so we just lived in a tent, with our things under a tarp. It was a mistake. We spent a lot of time fighting the damage that rain can cause and ended up losing sleep and energy. After having to dry our things out on several occasions, we bit the bullet and built a small shed. It ended up taking us only three days and cost $250, and we kicked ourselves for not doing it sooner.
The number one rule of building your own home is that it will take longer than you think. No matter how fast or experienced you think you are, things crop up and get in your way. Having somewhere dry and warm to live in while you build will make all the difference in your energy levels.
The shed we built was a simple wooden frame with OSB covering and metal roof. It also had a gutter and small tank attached to it for rain catchment. It’s not particularly pretty and won’t last forever, but so far, it’s been there for 7 years (as of 2015) and continues to be a waterproof area for tools and storage.
So, if you move to a place without any existing shelter, go ahead and make a shed, using a quick material like wood or metal. It’s cheap, quick and worth the effort.
Choosing the site where your home will be is extremely important, as you will have to live with your decision as long as you stay in that house. There are several factors that you should bear in mind, so that you make the best choice possible.
Before you start any kind of building project, there is a lot you need to think about. Try and do as much research as you can, as well as plans and models, to avoid any unforeseen complications. Things like winds, rains, heat, cold, valleys, rocks, etc. are not easy things to bend to your will, so work with them. Get to know your land and environment as intimately as you can. If you are new to the area, talk to as many locals as you can before starting to build.
We have no building codes where we live, but that cannot be said for most people. Find out what kind of restrictions you will be subject to before you begin work.
If you have flat land, you will have less work to do on leveling a building site. However, you do not want to build in a flood plain. If there’s no natural drainage, you will have to provide some, or start looking into elevating your house.
Hills provide natural drainage, but also a stronger flow of water, so direct it well. The steepness of the slope will determine how much you have to cut out or fill in to level your building site. If you have to cut out a lot, you might consider having steps in your house, so that some rooms, or areas of a room, are raised slightly above others.
If you have a choice, build on the southern face of a hill. You will be more protected from cold, northern winds, and have more access to the warmth of the sun. A northern face will keep your house in the shade, especially in winter, when the sun is lower in the southern skies. This will increase your need for additional heating.
If you can think about your heating and cooling systems before you start to plan your house, you can save a lot of expense. The more the house is built to fit the environment, the more comfortable the ambient, natural temperature will be. For example, where we used to live we saw temperatures of 120ºF in summertime, but our house had no air-conditioning. We had windows and a vent system that ensured airflow and kept the place cool (and a fan for the rare days that it was completely still on our hill). We also had thick adobe walls, which, in summertime, never saw the sun, because of porches and eaves. The eaves hung out far enough that they blocked the sun in summer, yet in winter, when the sun’s path is lower in the southern skies, the sun hit the adobe all day long. Same with the porch on the east side: it was designed to be covered by vining plants, watered by the kitchen sink. In summer, their leaves would be thick and offer significant shade; in winter, the leaves would die and the sun could shine through.
Use eaves and porches as much as you can. They will control when the sun enters your home.
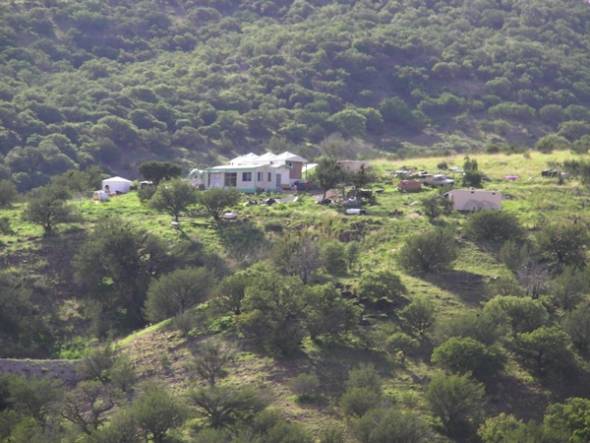
Our house now is built on the southern slope of a hill. We have no windows on the north, as that would be where cold comes in, and in fact the house is partly underground on the north side. The south face of our house has huge windows, all over the place. The eaves above them keep out all sun in summer when the sun in high. However, in winter when the sun is low in the sky, its rays reach way into the rooms, and we rarely have to light a fire, except on very cloudy days.
Buried houses have a lot of inherent thermal mass, so if you live somewhere that faces extreme heat or cold, consider building at least partially underground.
Also think about where your high winds come from. If you can build in a spot shielded from them, it will help. If not, consider planting trees as a wind break.
Every climate is different. Study the weather patterns in your area and build your home to withstand the extremes, whether they are heat, cold, high winds, hail storms, etc.
Rocky ground allows for a good, solid base for your house, but it’s a pain to dig. Plan your house so that there is as little digging as possible. Filling in is easier than cutting through bedrock.
Soft ground is not as stable, and your efforts should revolve around making your foundation as strong as possible. The advantage is that you can make your home partially underground; the earth’s thermal mass is better than any insulation you can buy.
There are some types of soil that are ill suitable for building. Study the characteristics of your soil. Consider how much it shifts and sinks under weight, and how it reacts with frost and water.
If you can build with your environment, you will never have to fight a losing battle against it. Choose a site according to the natural advantages and disadvantages of your land. No obstacle is insurmountable so long as you know that an obstacle exists. The surprises are where the true problems lie.
When putting up any building, you must first have a very good idea of what the building will be. You want to spend as much time as you can in making plans, and a model is a good idea. It helps to know where windows and doors will be, as you might need to allow for them in your foundation. Where do your water, electric and gas lines come in and out? At what level do they need to come in: ground level, top of the foundation, up the wall a couple of feet?
The more you can think about the house as a whole, the less chance that you will miss an important detail that you cannot incorporate later. It’s also a fun stage. Get the whole family together and enjoy making the dream of your home a reality.
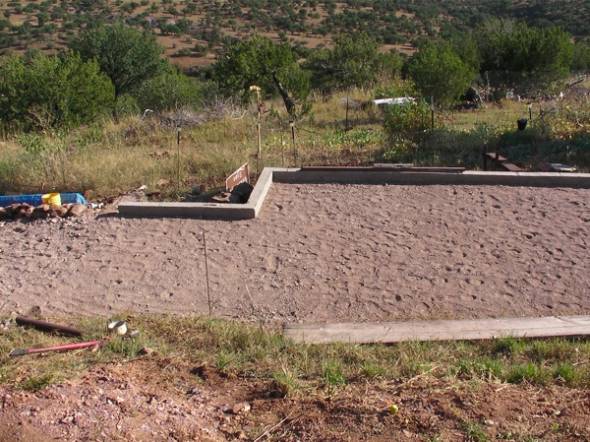
The physical part comes next. You will have to clear the area of brush, trees, rocks, and other obstacles. And then you’ll need to level the ground. You can do this by cutting out or filling in, though a combination of the two is often the least labor intensive. Machines cost money, but they are fast. Doing these tasks by hand is cheap, but it can zap your energy and motivation. It depends on what your land and design is like.
It’s a good idea to spread out and compact sand over the whole thing, as a drainage layer and sound base for your foundation. You may need to build retaining walls before doing so.
Make sure you take photos before you do anything and at every stage thereafter: it’s great to look back and see how far you’ve come.

There are always times that the rain can come down in a torrent. You do not want that flow to get under or into your home, where it can cause damage to the foundation or interior. So, before you even start building, put some thought into how you can divert that water.
You can build on top of a hill, where water will naturally run away from you, but that can leave you far more exposed to the elements. So it is best to select your site based on other motives and then adjust it to take care of the water.
Building your home on a compacted sand bed will help provide a drainage layer under the house should water get under. That acts as last resort, but there are other things you can do to avoid having to make use of it.
On any uphill part of your house, dig a trench that flows down and away from the building. Place some black plastic in the bottom of the trench and up the downhill wall of it. On top of the plastic, lay a 4″ drainage pipe (one that has holes in it), so that water can enter it and move away swiftly. Then cover the pipe with gravel. Water drains quicker through sand and gravel than through soil.
The end of the trench and pipe should flow either into a trench for a pond, or into a garden or orchard.
You can put other trenches or swales further up the hill, to divert water from that part of the property to a pond or garden, so that the water that actually reaches your building and French drain is lessened.
At the base of your walls, you can lay down a vapor barrier, like plastic, which goes into your drainage trenches. Then put dirt on top of, sloping from the wall down into the trench. That way, any water hitting your walls or the ground in between the house and drainage trench will flow into the trench and away from the house.
Plants are great for water control. They will suck up much of the water and their roots will help bind the soil and keep it from eroding.
If you can use plants for erosion control, do so, but consider what kinds are best suited to your climate. They need to be able to withstand any extremes your area encounters.
With these simple measures, you can go a long way to protecting your home from the damage caused by water. Of course, you should try and avoid building in a flood zone, but if that is all you have, then you may have to take more extreme measures, like raising a building up. The materials you would have to use should be durable when submerged in water.


